The problem we have here is both the external render and internal plaster(board) reveals are within the structural opening. This as we all know is wrong, and can cause some headaches to put right.....PLEASE dont use masking regions and linework!
 |
| incorrect reveal detailing |
This can be fixed with a few family edits and here is how.
Firstly we need to edit the window family.
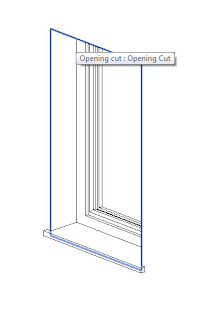
Within the 3D view for the window, select the opening cut and delete it.

Now go to the floor plan view and you will see the window has no wall cuts, we need to add two. But before we jump in, we are going to need some parameters and references.
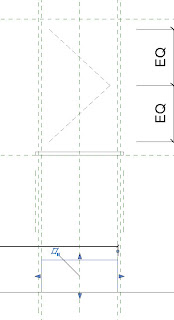
Add four references to the window as shown below, two the to the external side, two to the internal side. Make sure they are of equal distance on each side ( I choose 20mm)
Next dimension these from the left side and right side, then add parameters to these dimensions.
Name the parameters external and internal reveal.
Now create a void extrusion and lock the sketch lines to the rear of the frame, internal wall and your new references.
You will also need to line up the void extrusion to the bottom and top of the window opening, choose the internal elevation view and adjust and lock the extrusion. Once done, use the cut geometry tool to cut the extrusion into the wall.

Do the same again but for the external, locking the void extrusion to the rear of frame (internal) and your external references. Also using the external elevation view to lock to the top and bottom of frame and then using the cut geometry tool.
Now edit the internal sill extrusion so it locks to your internal references, and the same for the external masking region.
You should end up with this result
Now lets load this into our project and overwrite the current version.
It is not correct yet, you will to adjust the properties to suit your wall type.
This was has 15mm render, 100mm block, 100mm cavity, 100mm block and 12.5mm plasterboard.So edit your new parameters to fit and adjust the wall wrap dimensions from within the window properties and you should end up with this.
 |
| incorrect |
 |
| correct |
You can use the same method for doors and all windows. All correct with no need for linework or masking regions.
All edits were done using the Revit 2012 default families (which are still broken!)


Great solution to this annoying oversight..
ReplyDeleteTruly thinking out of the box or, if the box
dont work.. replace it with 2 of your own ;)
Thanks
Victor
love this great tip thanks
ReplyDeleteGreat Tutorial! I'm almost completed however I'm wondering if anyone could help me get passed the issue of the plasterboard over the top of the cavity closer (As shown in the incorrect illustration). Many Thanks
ReplyDeleteAlex Walker
hi, i am on skype if you require more help j.still.pc
ReplyDelete